Attaching the mop head to a flat mop handle might seem like a simple task, but it’s an essential step that can greatly affect the efficiency and usability of your cleaning equipment. As a flat mop supplier, I’ve seen firsthand how proper attachment can make a significant difference in the overall cleaning experience. In this blog post, I’ll guide you through the process of attaching the mop head to a flat mop handle, offering tips and insights based on my years of experience in the industry. Flat Mop

Understanding the Components
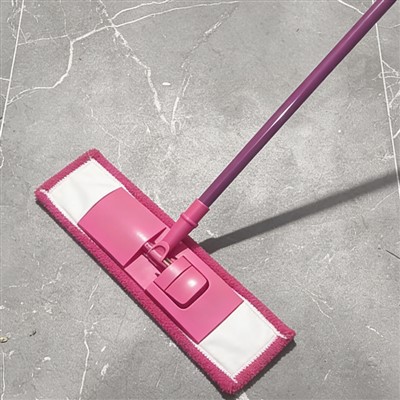
Before we dive into the attachment process, it’s important to understand the different components of a flat mop. A typical flat mop consists of two main parts: the mop head and the handle. The mop head is the part that comes into contact with the floor and is responsible for picking up dirt and debris. It is usually made of a absorbent material such as microfiber or cotton. The handle, on the other hand, is the part that you hold onto while cleaning. It provides leverage and allows you to reach different areas of the floor.
Types of Attachment Methods
There are several different methods for attaching the mop head to the flat mop handle, each with its own advantages and disadvantages. The most common attachment methods include:
- Velcro Attachment: This is one of the most popular attachment methods for flat mops. It involves using Velcro strips on both the mop head and the handle to secure the two parts together. Velcro attachments are easy to use and allow for quick and easy removal of the mop head for cleaning or replacement.
- Snap-On Attachment: Snap-on attachments use small plastic snaps to secure the mop head to the handle. This type of attachment is more secure than Velcro and is less likely to come loose during use. However, it can be a bit more difficult to remove the mop head for cleaning or replacement.
- Clip-On Attachment: Clip-on attachments use small clips to secure the mop head to the handle. This type of attachment is similar to snap-on attachments but is usually easier to remove. Clip-on attachments are a good option for those who need to frequently remove the mop head for cleaning or replacement.
Step-by-Step Guide to Attaching the Mop Head
Now that you understand the different attachment methods, let’s go through the step-by-step process of attaching the mop head to the flat mop handle.
Step 1: Prepare the Mop Head
Before attaching the mop head to the handle, make sure it is clean and dry. If the mop head is dirty, wash it according to the manufacturer’s instructions and allow it to dry completely.
Step 2: Align the Mop Head with the Handle
Once the mop head is clean and dry, align it with the handle. Make sure the Velcro strips, snaps, or clips on the mop head are lined up with the corresponding parts on the handle.
Step 3: Attach the Mop Head to the Handle
Depending on the attachment method you are using, follow these steps to attach the mop head to the handle:
- Velcro Attachment: Press the Velcro strips on the mop head firmly against the Velcro strips on the handle. Make sure the two parts are securely attached and there are no gaps between them.
- Snap-On Attachment: Align the snaps on the mop head with the corresponding snaps on the handle. Press the snaps together firmly until they click into place.
- Clip-On Attachment: Align the clips on the mop head with the corresponding clips on the handle. Press the clips together firmly until they snap into place.
Step 4: Test the Attachment
Once the mop head is attached to the handle, test the attachment to make sure it is secure. Gently tug on the mop head to see if it comes loose. If the mop head is loose, reattach it using the same method.
Tips for a Secure Attachment
To ensure a secure attachment between the mop head and the handle, follow these tips:
- Clean the Attachment Points: Before attaching the mop head, make sure the attachment points on both the mop head and the handle are clean and free of dirt and debris. This will help the attachment to stay secure.
- Use the Right Attachment Method: Make sure you are using the right attachment method for your flat mop. Different mops may require different attachment methods, so make sure you read the manufacturer’s instructions carefully.
- Replace Worn-Out Attachment Parts: Over time, the attachment parts on your flat mop may wear out. If you notice that the Velcro strips, snaps, or clips are no longer working properly, replace them with new ones.
- Store the Mop Properly: When not in use, store the flat mop in a dry place. This will help prevent the attachment parts from getting damaged or worn out.
Conclusion
Mop Attaching the mop head to a flat mop handle is a simple but important task that can greatly affect the efficiency and usability of your cleaning equipment. By following the steps outlined in this blog post and using the tips provided, you can ensure a secure attachment between the mop head and the handle. If you have any questions or need further assistance, please don’t hesitate to contact us. We are a flat mop supplier and are always happy to help. Whether you’re a professional cleaner or a homeowner looking for a reliable cleaning solution, our flat mops are designed to meet your needs. Contact us today to discuss your requirements and explore our range of high-quality flat mops.
References
- Manufacturer’s instructions for flat mops
- Industry best practices for flat mop attachment
Yongkang Zhechu Daily Necessities Co., Ltd.
We’re well-known as one of the leading flat mop manufacturers and suppliers in China, specialized in providing high quality customized products. We warmly welcome you to buy discount flat mop in stock here from our factory. Contact us for free sample.
Address: Take Elevator Number 2 to the Fourth Floor of No.58 Hongye Road, Xixi Xishan Industrial Zone, Longshan Town, Yongkang City.
E-mail: 1733131066@qq.com
WebSite: https://www.zcryp.com/